| Learn what's changed with our new navigation design. |
This article applies to User Interviews
Who is this article for?
🗣️ All researchers (both admins and users)
⭐ Customers on any User Interviews plan
On this page:
- About the navigation changes
- Create a new project
- View participant panel
- Access team templates
- Manage team settings
- Manage account settings
- Get support
About the navigation changes
We believe that research recruiting should be fast, flexible, and easy to manage, so we’re thrilled to release a new primary navigation and refined style for User Interviews!
- The changes are primarily visual.
- No core functionality has changed as part of this update.
- A few features have been moved to improve the ease of navigation and support our future product vision.
Create a new project
- Before, the new project button was in an out-of-the-way spot at the top left of the page.
- Now, it’ll be hard to miss, right above your list of projects on the homepage. When you click this button, you’ll be taken to the same project setup that you’re familiar with.

View participant panel
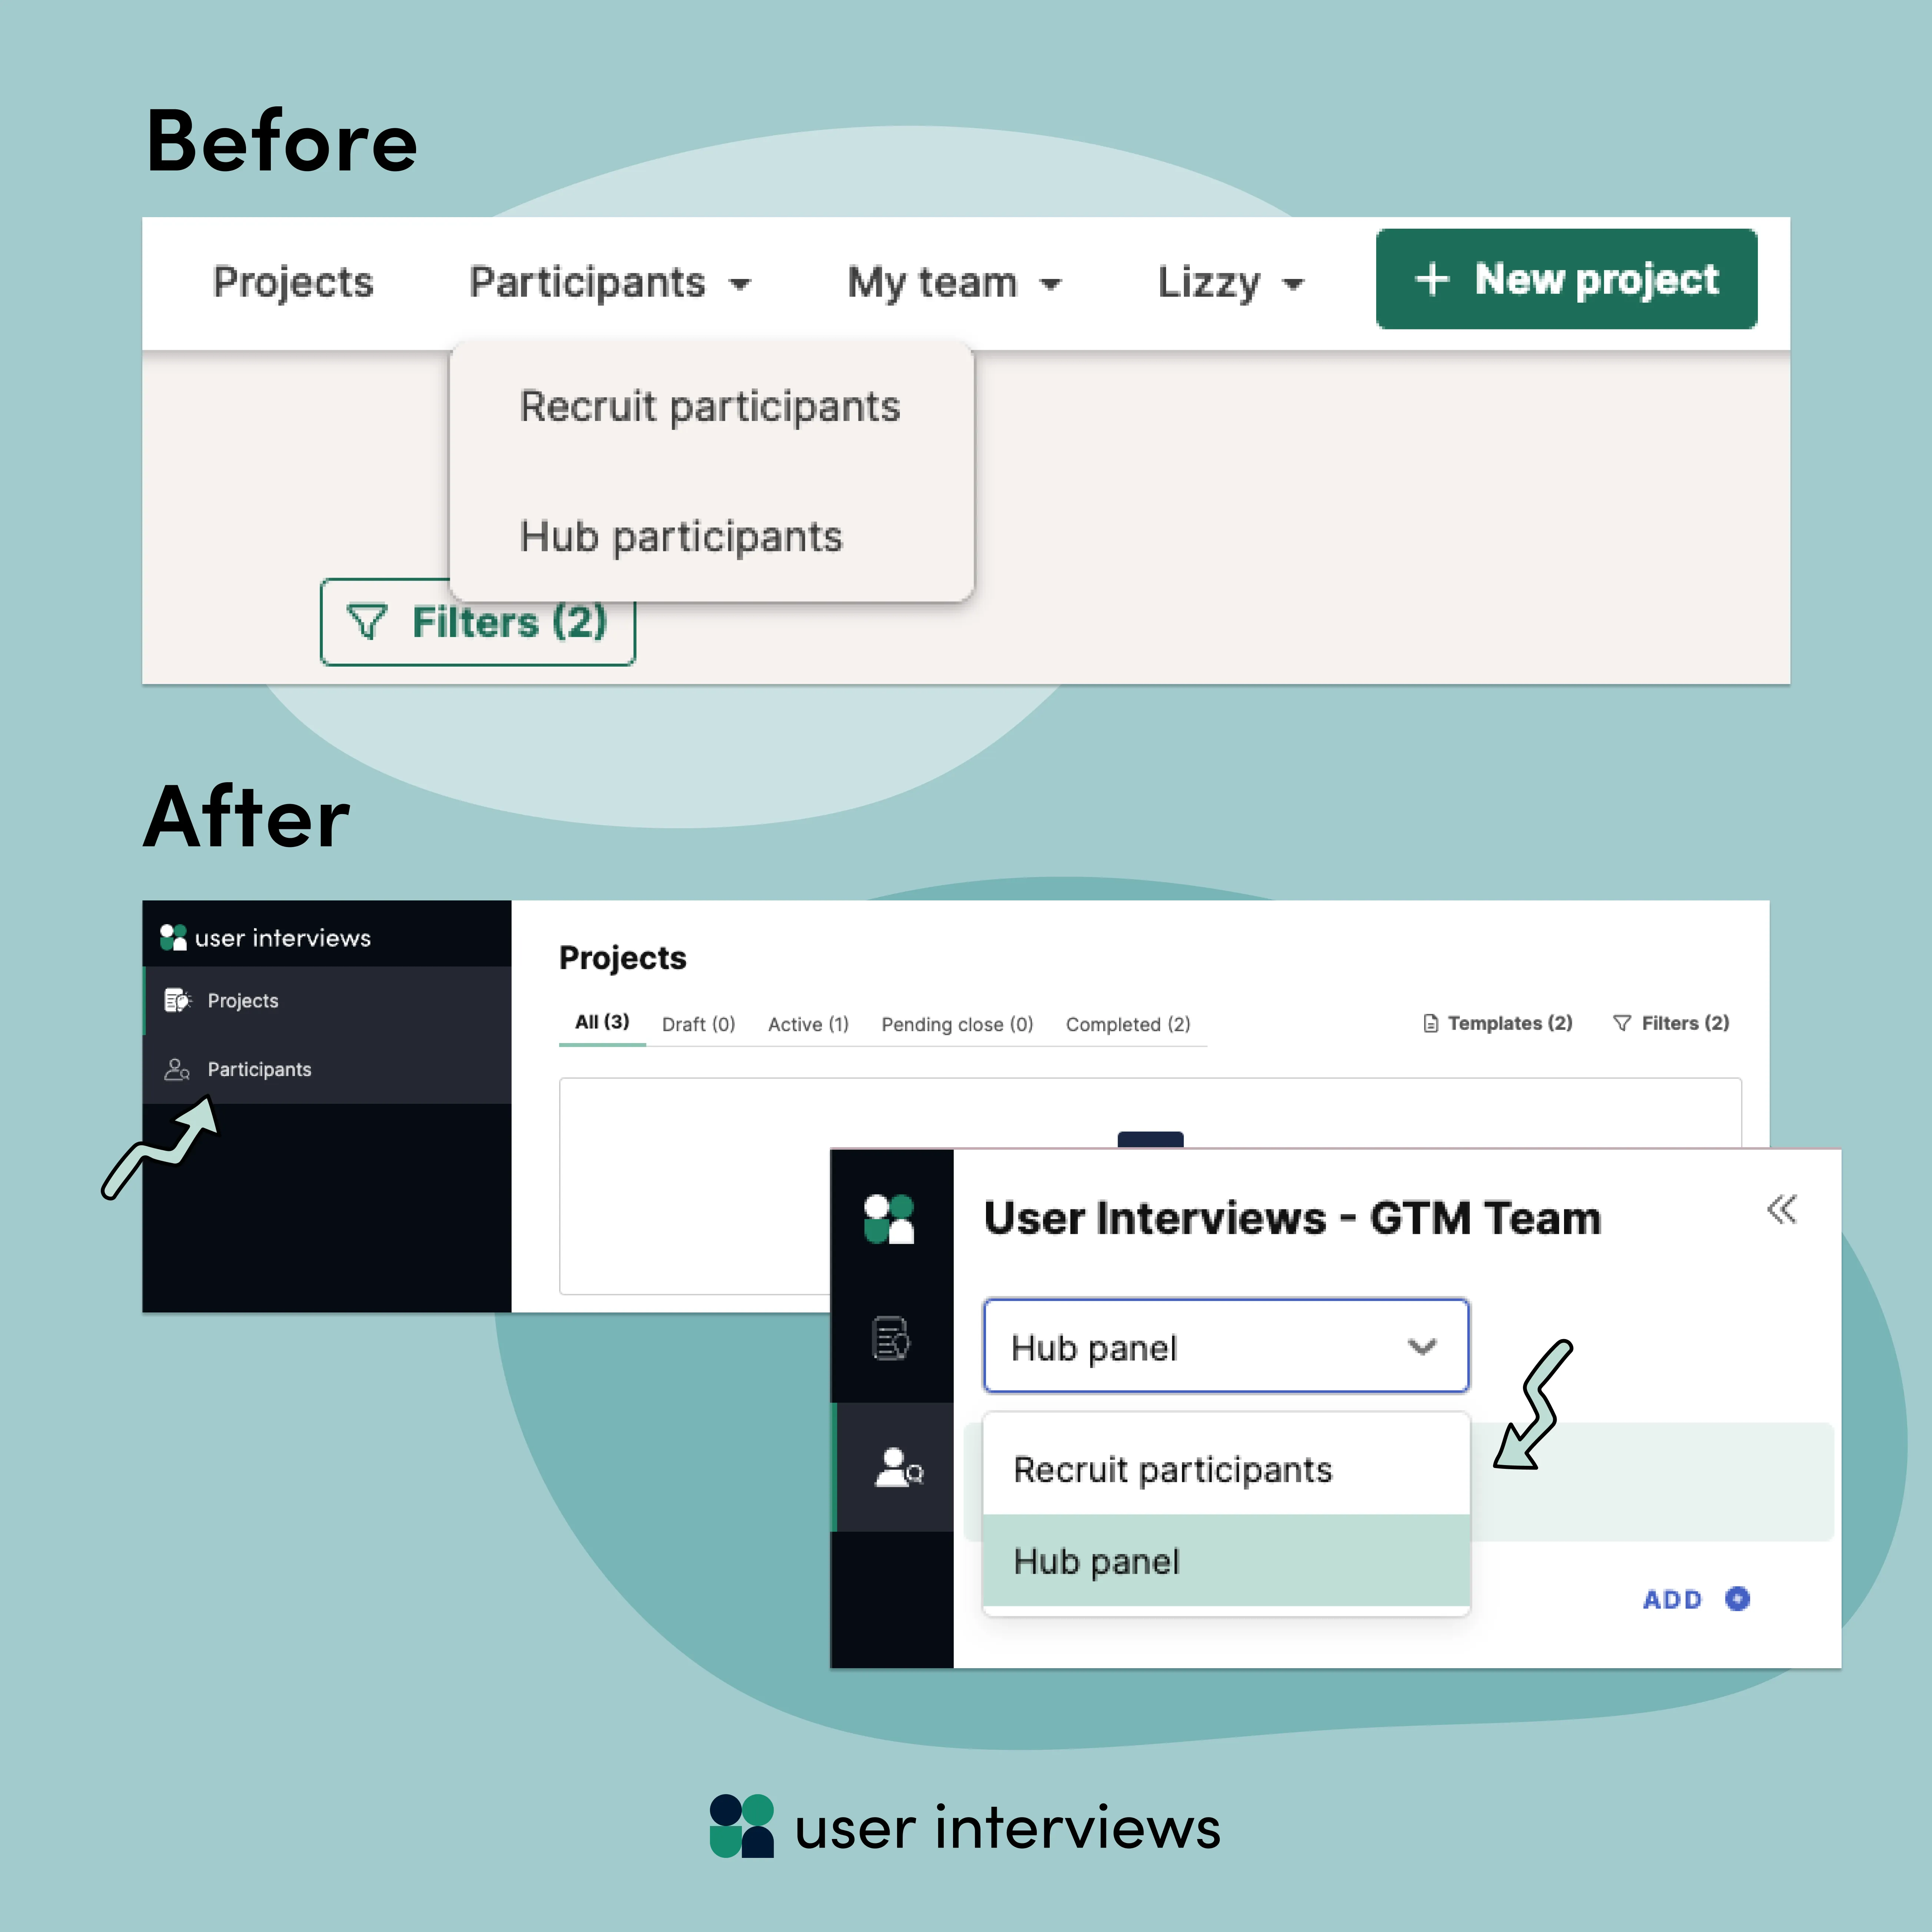
- Before, you could view both your Hub panel and past Recruit participants by clicking on participants in the main navigation and choosing an option from the dropdown.
- Now, participants live in the primary navigation. Hover over the bar to expand the navigation and click participants. From there, you’ll be able to toggle between your Hub panel and Recruit participants with the dropdown menu and access all the same panel management features as usual.
Access team templates
- Team templates used to live in an accordion on the top of the projects dashboard.
- Now, templates have been consolidated in the header row, reducing clutter on the Projects dashboard. Click the Templates button to launch a modal that houses all of your team’s saved templates.

Manage team settings
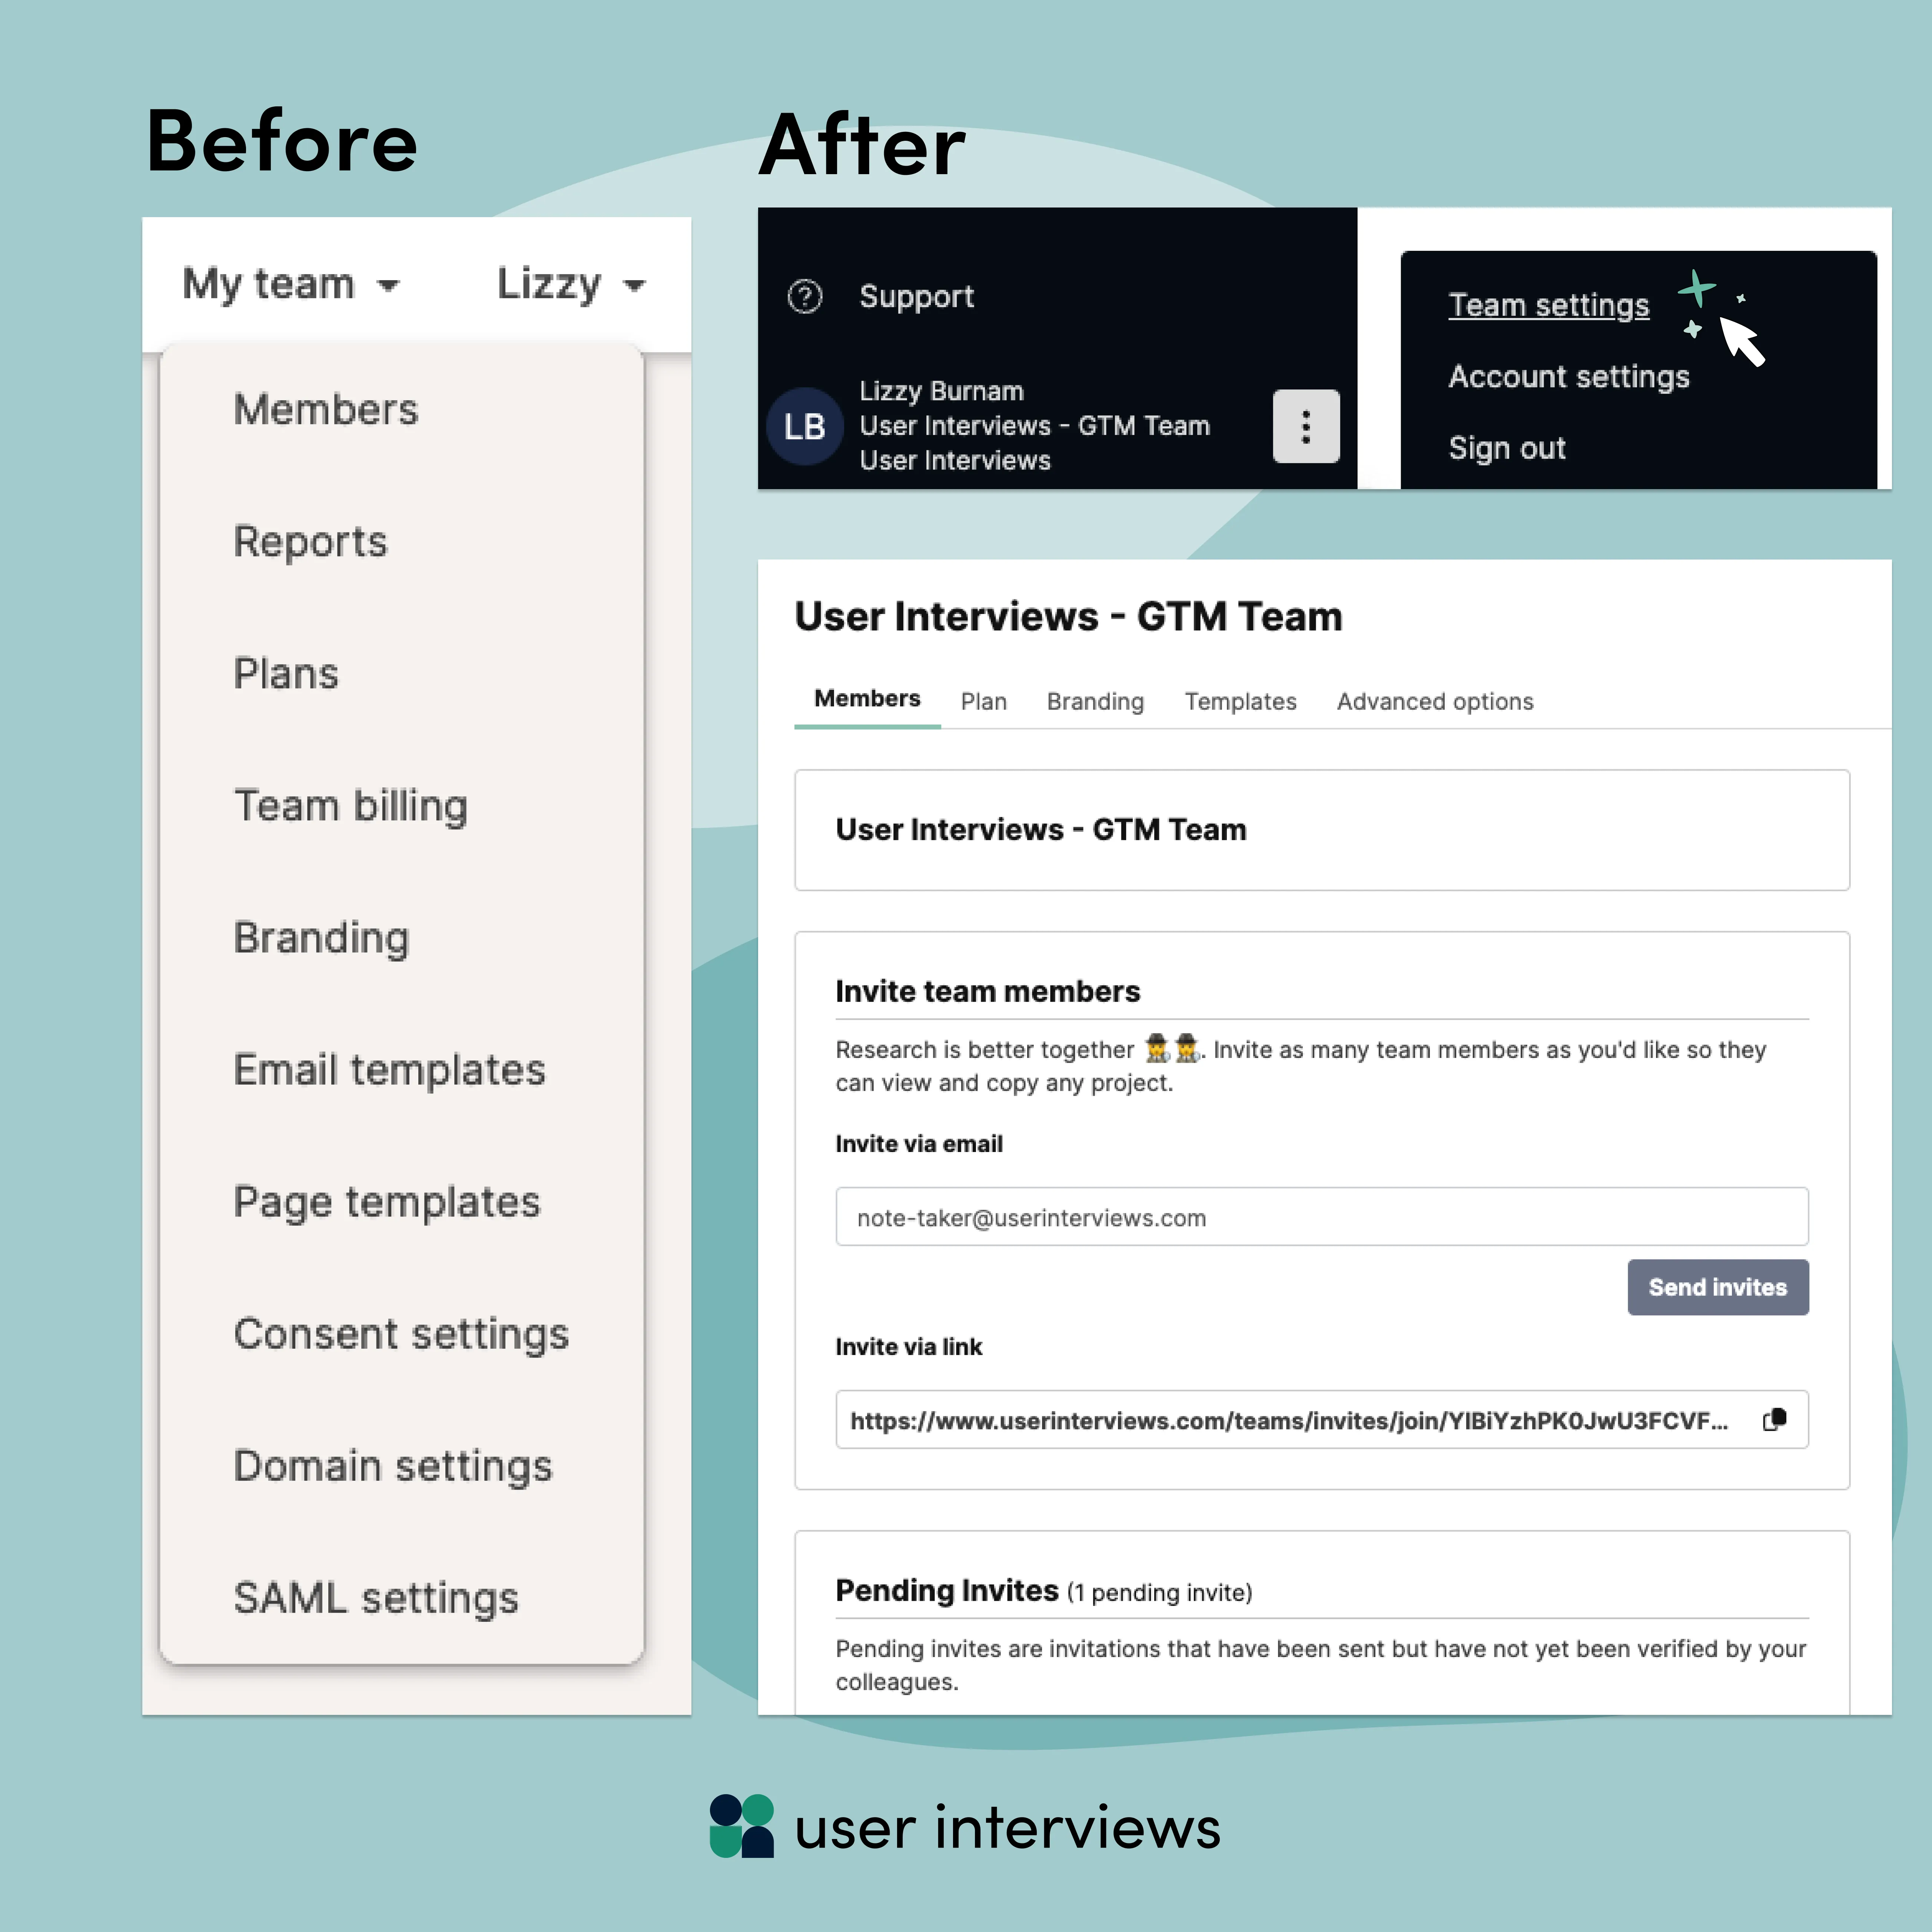
- Previously, you could access all team settings pages from a drop down in the main navigation.
- Now, access your team settings by clicking the kebab button next to your name at the bottom of the left navigation bar and selecting team settings. This will take you to a Team Settings page where you can:
- Invite and manage team members
- Review or upgrade your plan
- Manage logos and email themes in the branding tab
- Edit templates for pages, emails, projects, and the application confirmation page
- Manage advanced options like your data consent notice, footer, authenticated domains, and sender profile
Manage account settings
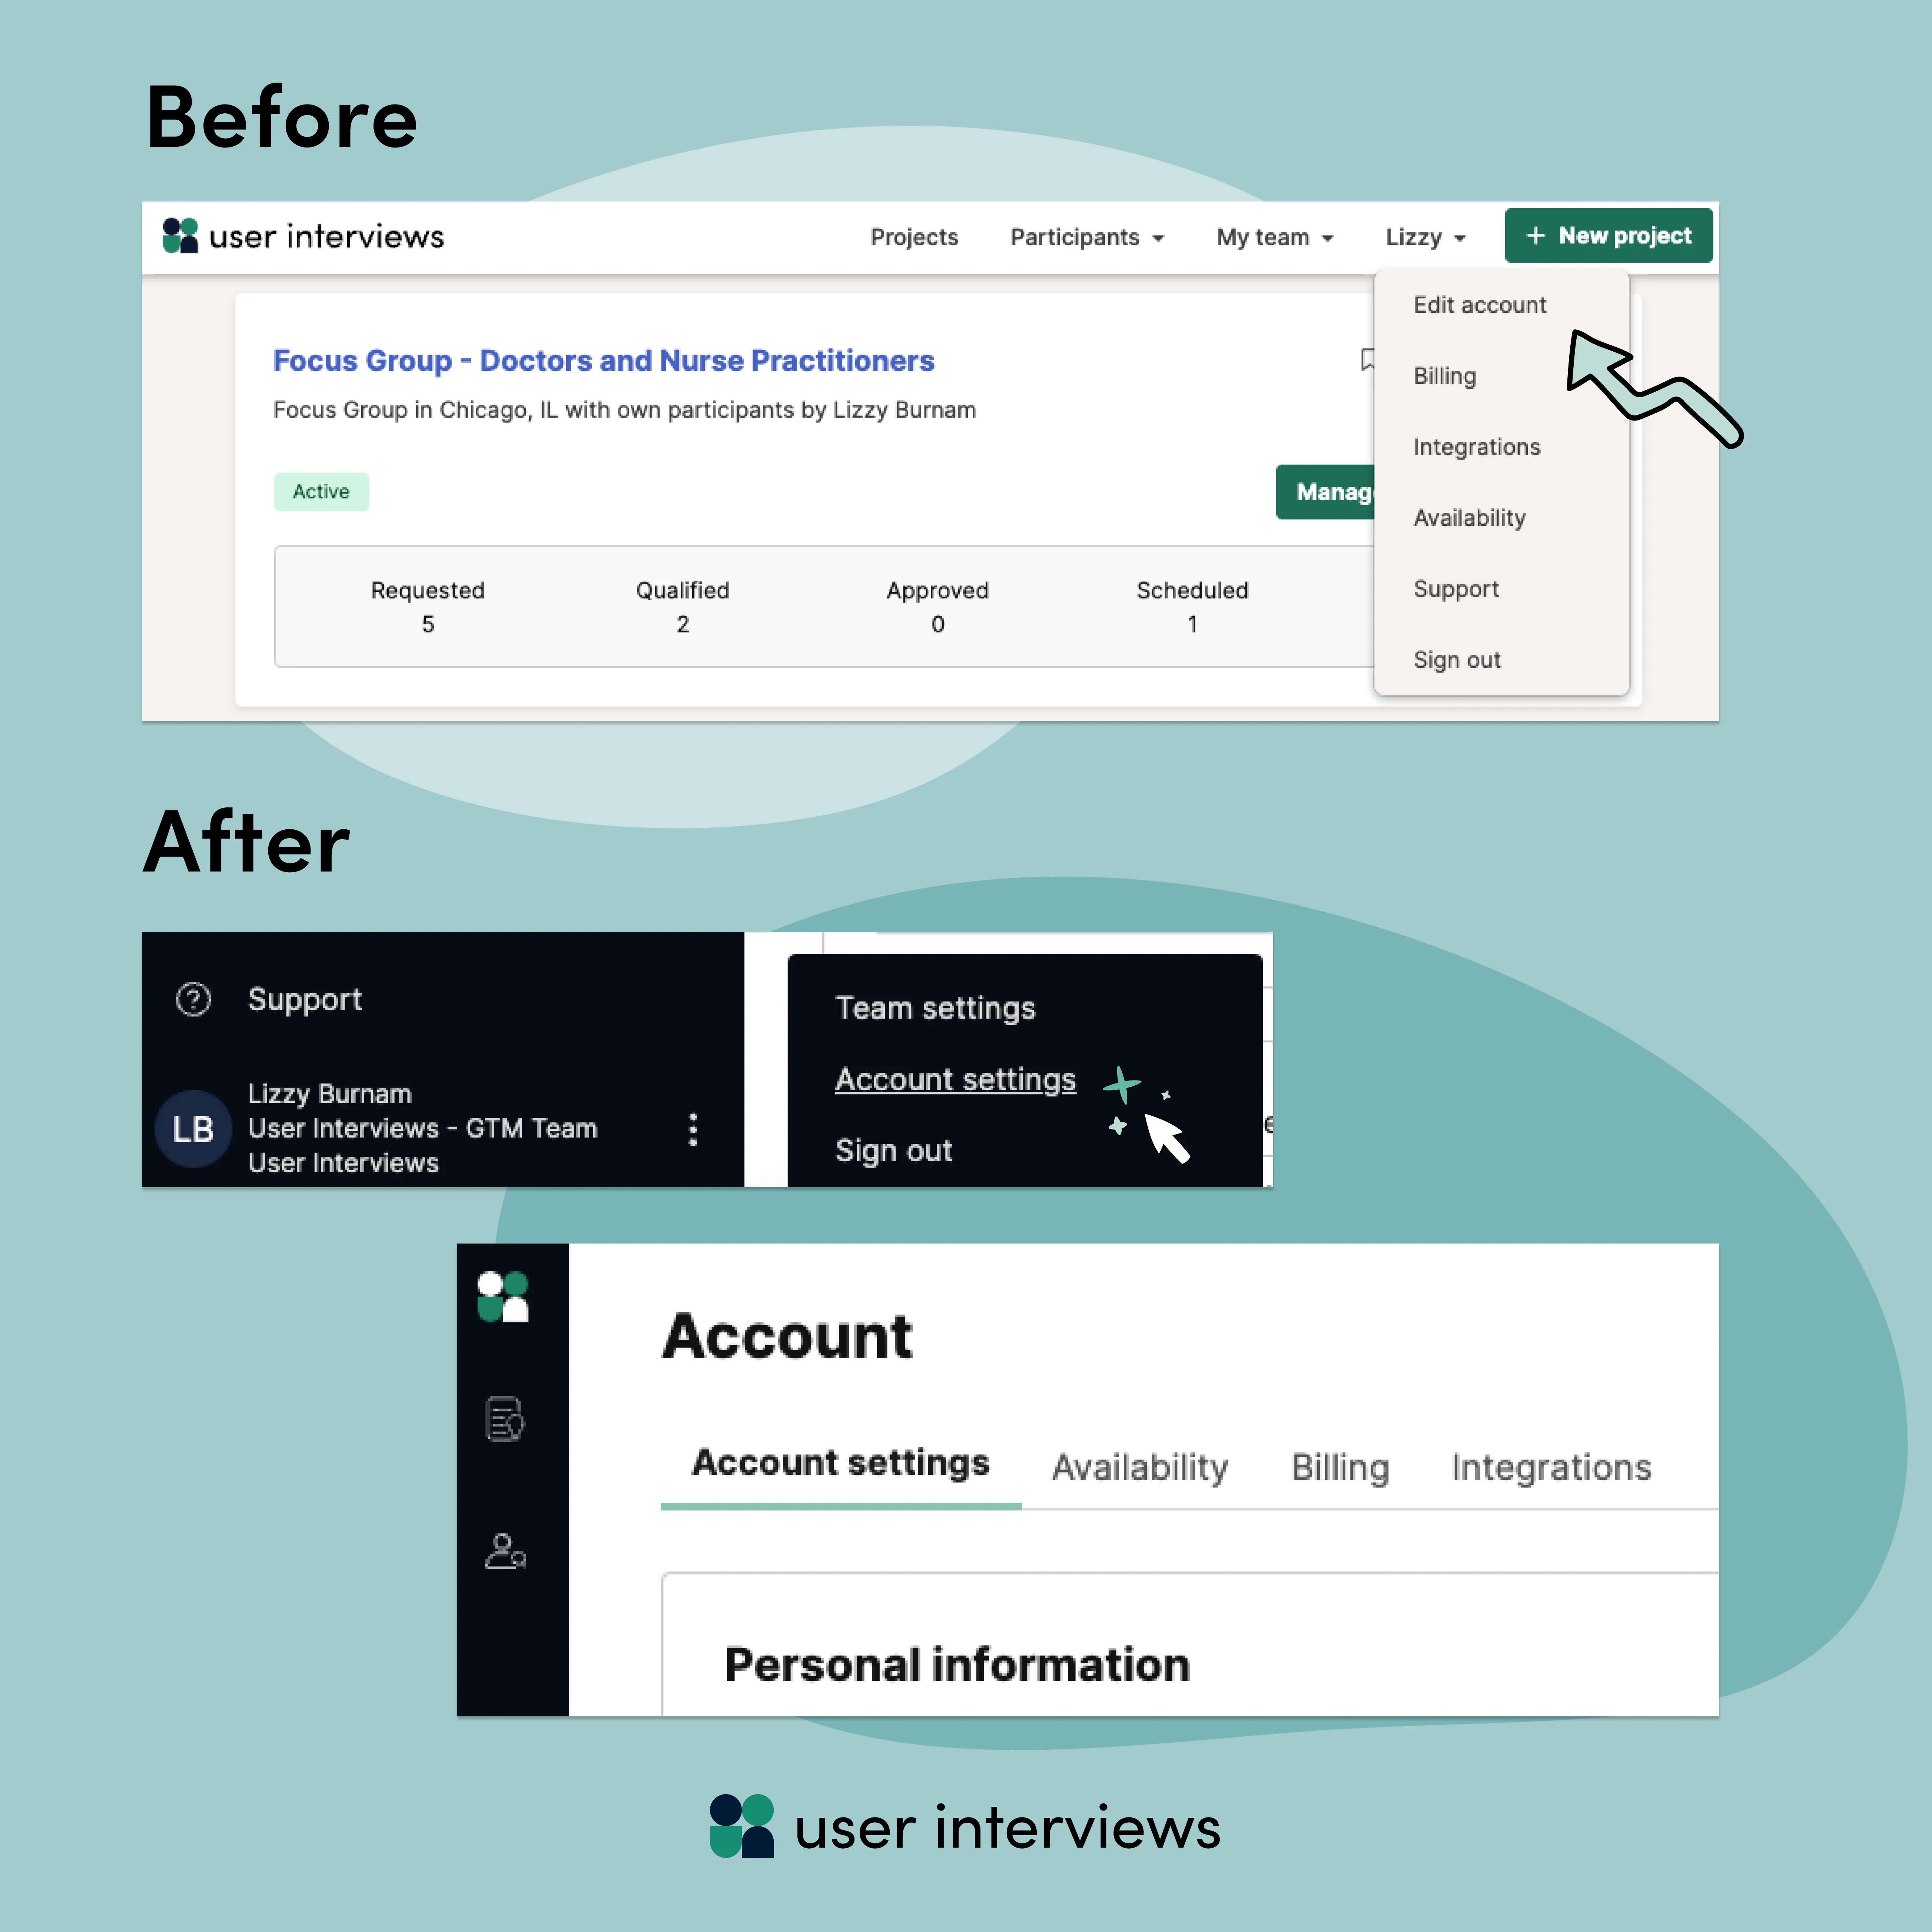
- You used to be able to manage your account settings via the dropdown under your name in the main navigation.
- Now, access your account settings by clicking the three-dot button next to your name at the bottom of the left navigation bar and selecting account settings. From there, you’ll be able to:
- Edit general account settings like your personal information and password
- Manage your availability by connecting your calendar and setting your working hours
- Add debit or credit cards for billing
- Set up integrations with other tools, like Zoom, Qualtrics, Sprig, and more
Get support
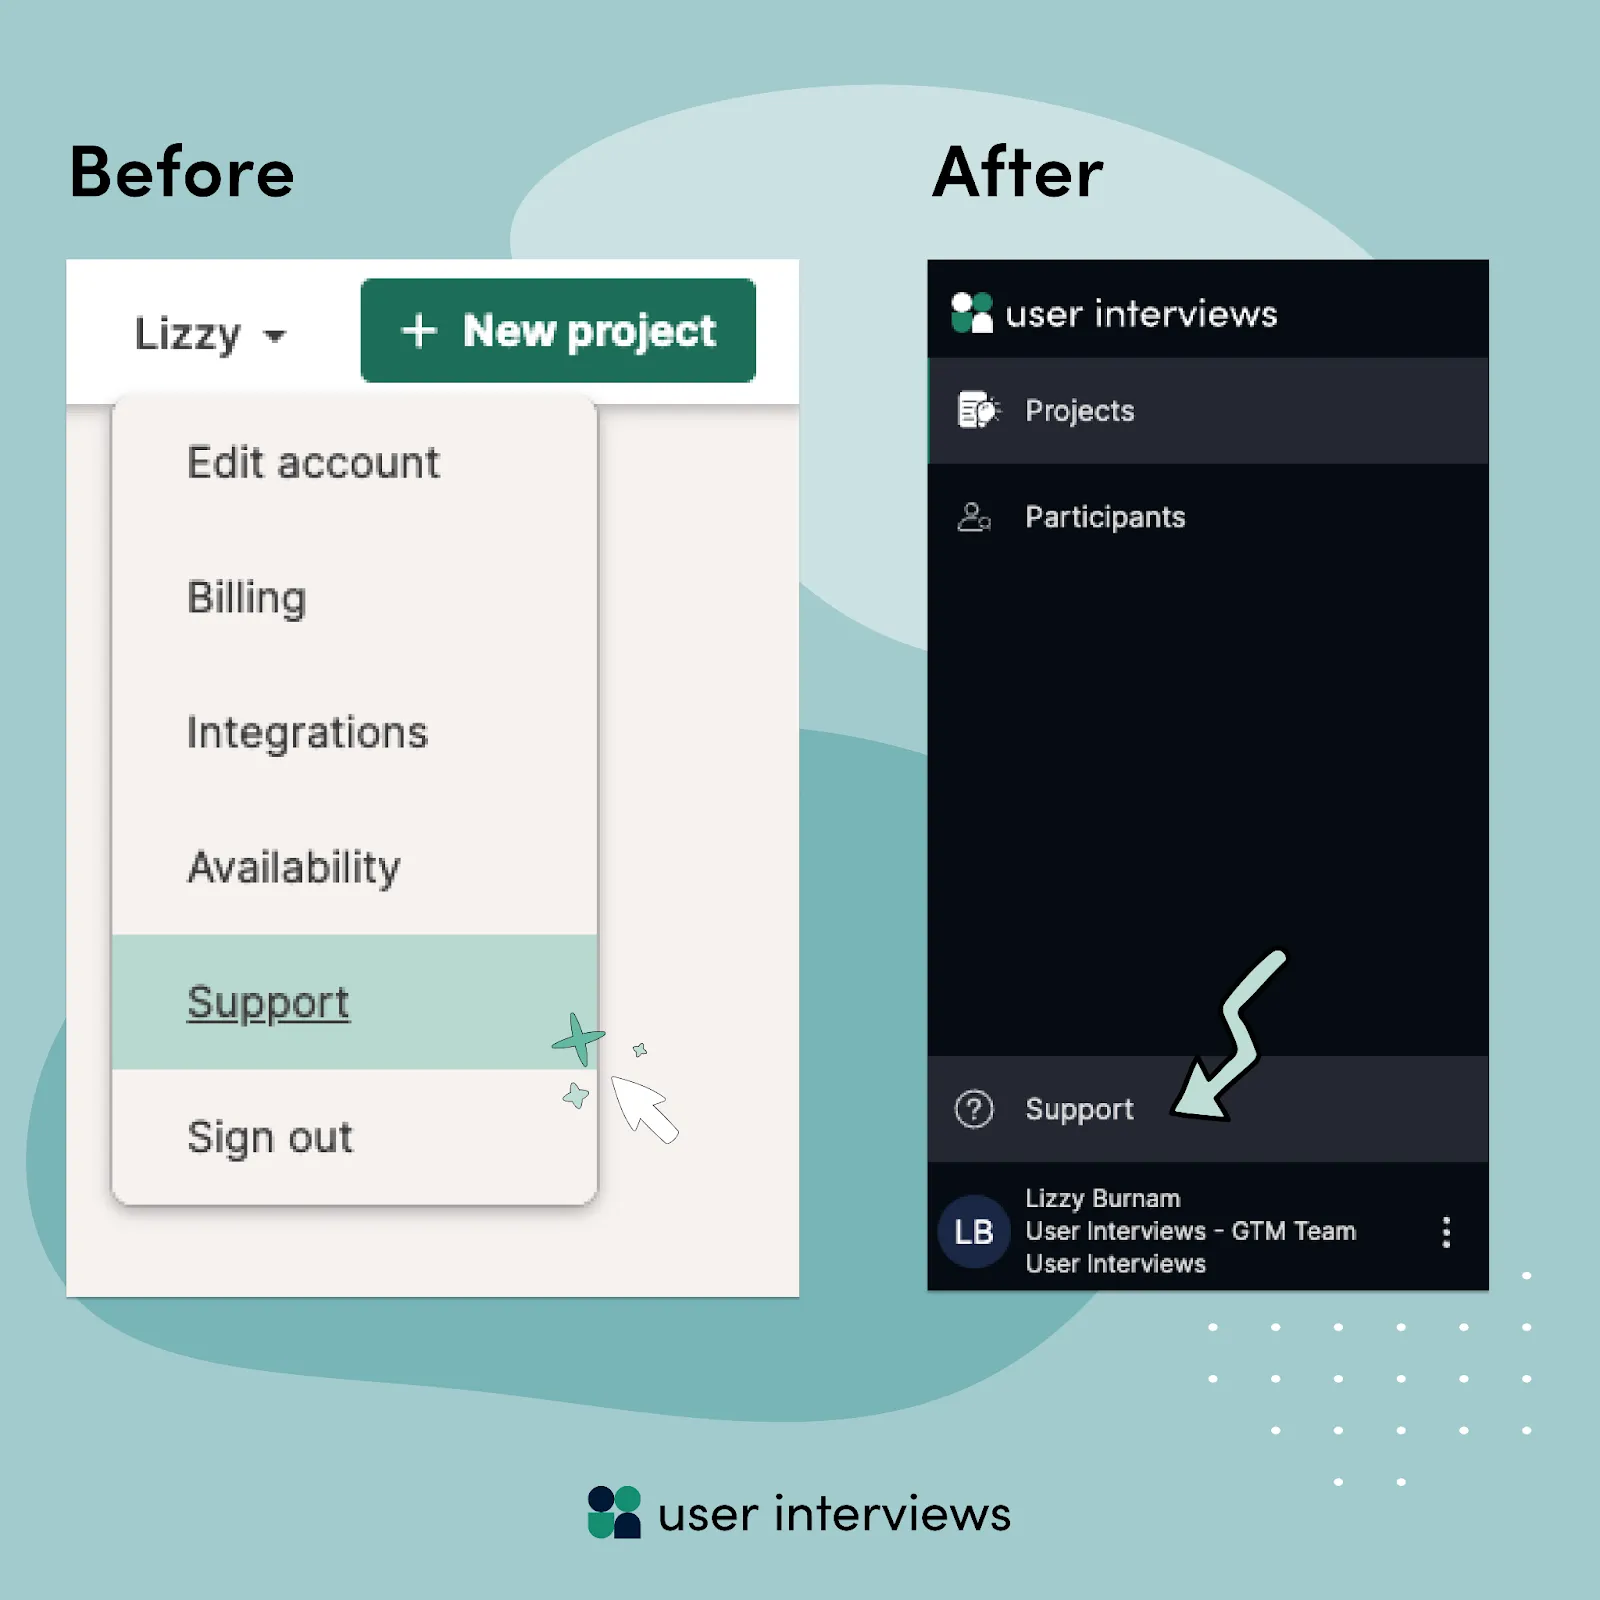
- Before, the support button was buried in the drop-down below your name in the main navigation bar.
- Now, our support site is easily accessible at the bottom of the left navigation bar.